|
|
Home | Projects | History | Rent | For Sale | Contact Me |
|---|
|
Sheffield Number 2 Special Hand Car Sheffield Special Number 2 Hand Car was the largest of handcars manufactured during the 1900's. This car had a platform that was two feet longer than the standard car. The special designation comes from two bench seats that run the length of the car that carried passengers. This car would have been used to move large work gangs. 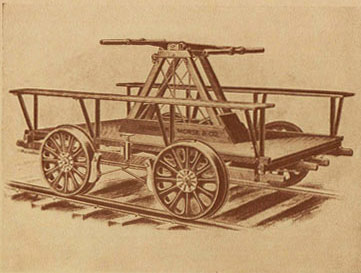
Special Hand Car While my current replica is quite functional, I am fabricating this car to be more true to the original plans. This includes building an authentic braking system, realistic pump handle, and fabricating authentic looking pivot bearings. Nearly everything found on this car was custom built just for this project. This includes U bolts, grab handles, seat brakets, various bearings, and brake system. While some parts like the gears came off the shelf, they had to be heavily modified. Even the bolts holding the wheels on were modified to look like rivets. 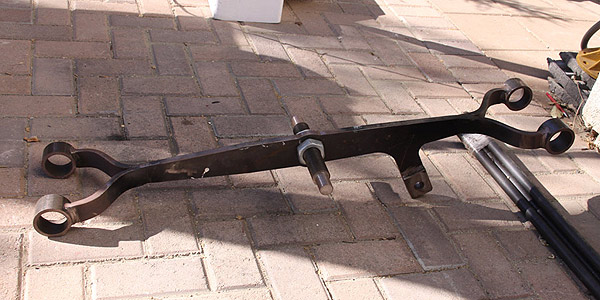 Handle under construction. I made five of these using modern steel. Original ones were wrought iron which has not been made in over 40 years. I designed the handle using orginal plans that I duplicated in Solid Works. The parts were water jet cut using my file. The ends were bent with a Harbor Freight bender and then welded in place. 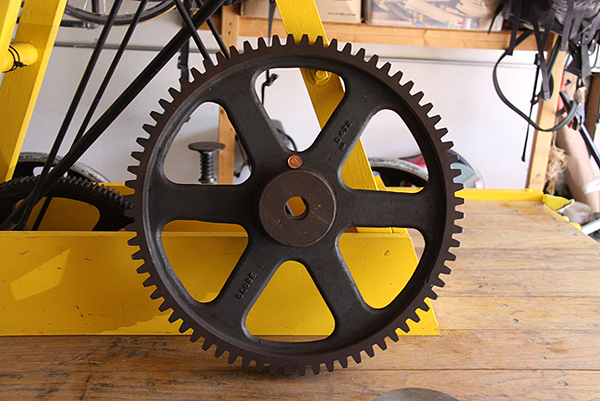 New gear with larger teeth than the modern gear on my first car. 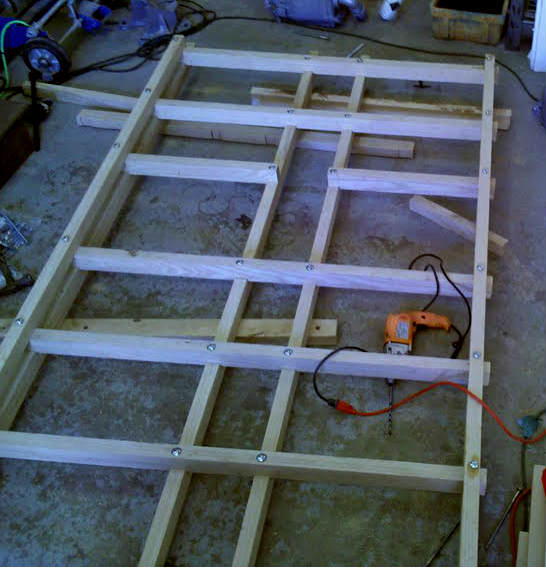 Bottom frame under contruction. The joints are double dado jointed and are within 1/32 accuracy. They are as close to prefect as I could get them. 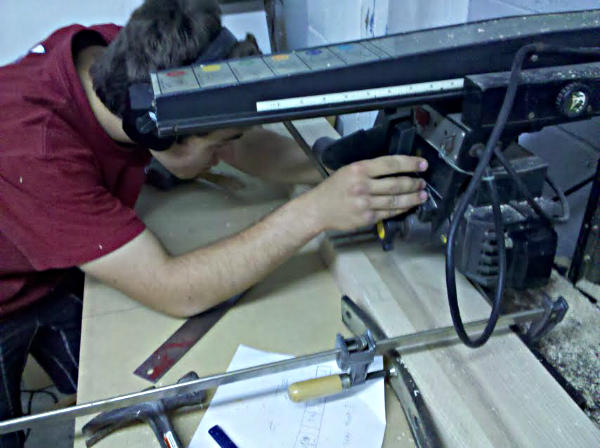 Cutting the joints using my early 1970's era Sears radial arm saw. I bought this on Craigs List with a compliment of blades for $75. Making the mortise and tenon joints is extremely difficult for this car. The extreme angles of this hand car require a modified machine. In this case I took a Harbor Freight mortise machine and coupled it with the table from one of their cheap drill presses to create a machine capable of cutting the joints at an angle. It might look junky, but it works.  Close up of the mortise joint being cut. There is a drill bit in the center that drills the hole. Then I place pressure using the handle to square off the joint with a hollow centered chisel. In the center of the chisel is the drill bit. 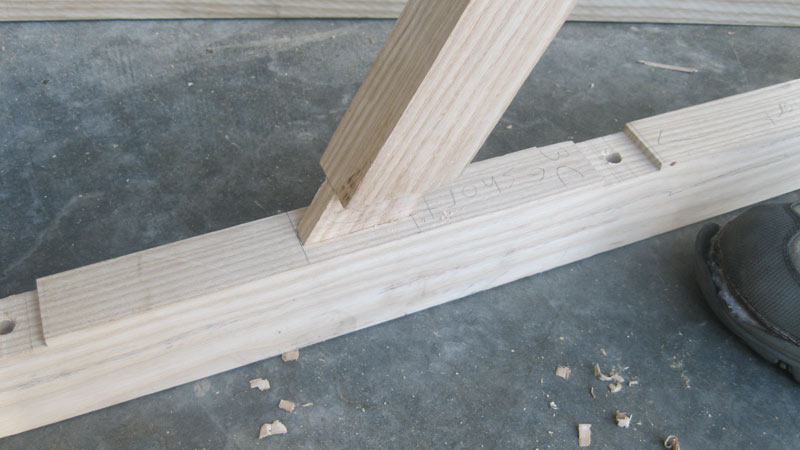 Here is the finished joint just before going together. 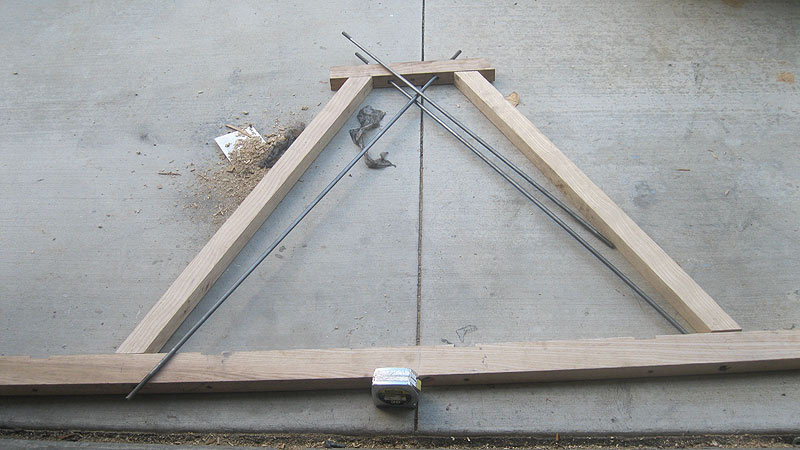 The finished a-frame with the tension rods in place. The joint doesn't provide the strength, the tension rods do. 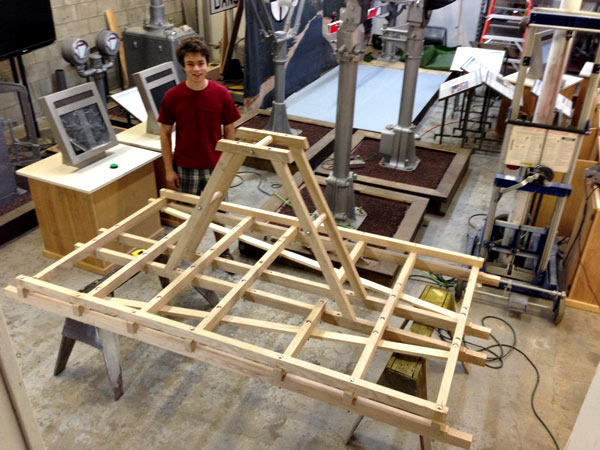 Frame put together. Next comes axles holes are drilled before being painted. 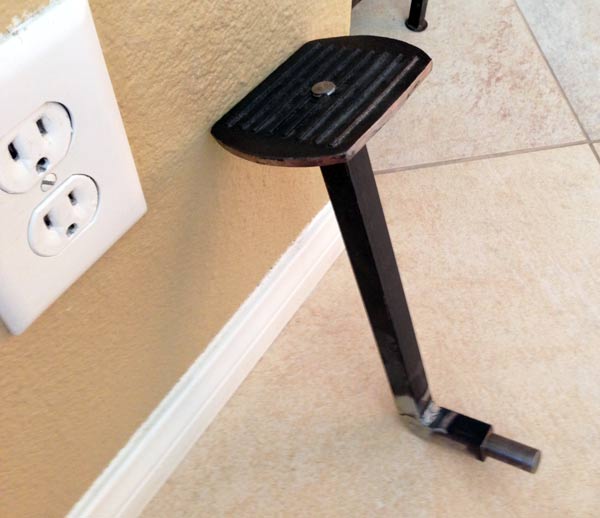 Brake shoe almost done. I made a mold master for the foot pad out of wood to the dimensions of an original Sheffield model. It was then cast in iron and placed on the brake lever.  Crankshaft and gear on the frame. There is very little clearance so to account for swelling I am going to mill down the gear a little further. 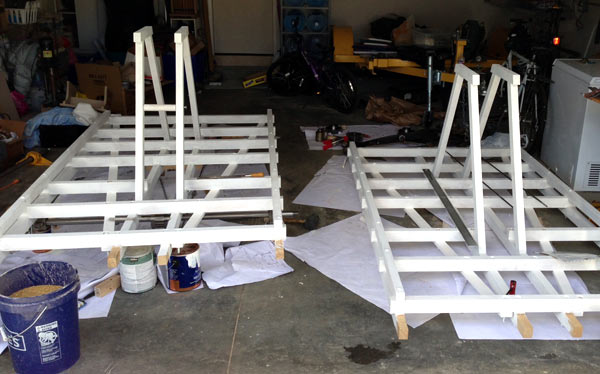 I had some spare time while I waited for some parts to be created so I went ahead and built out a second special hand car frame. 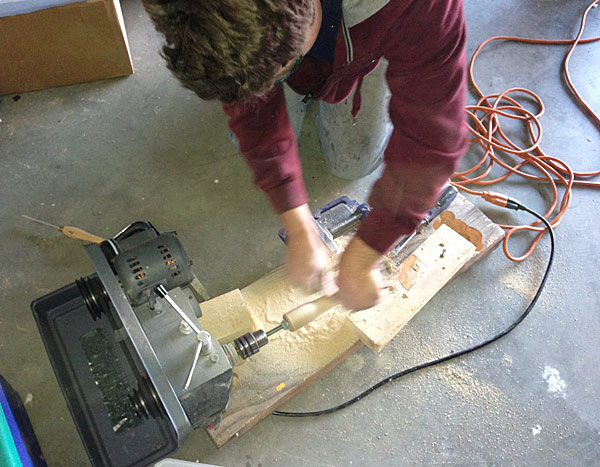 When you don't have a shop available, you have to improvise. I needed to turn a wood dowel to make room for the pivoting pump handle. I used the leftover Harbor Freight and Tool drill press head to make a lathe. The table was used on my home made precision mortise machine. 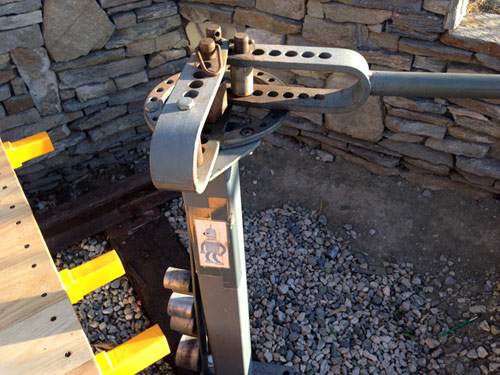
This is the $80 Harbor Freight and Tool bender I use to bend parts such as the handle, seat brackets, and various other metal parts on the car. I will admit that electro plating hand car parts is not exactly prototypically accurate, but it does make the car rust resistant. I am very fortunate that my Uncle owns one of the largest plating plants in Southern California. General Plating has about 100,000 square feet of plating facilities and they can plate anything of any size.  For the hand cars the goal of plating is to prevent corrosion. For this reason many of the parts have been zinc plated to protect the iron and steel from water. The first step is to connect all the parts with copper wire so that the parts become part of an electrical circuit. I also zinc plated many of the fasteners that I could not purchse already plated. 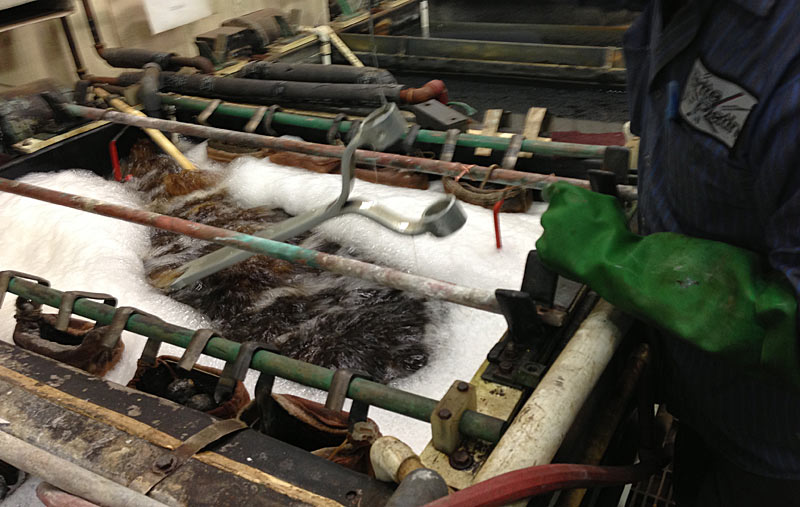 Here we see the lever arm being removed from the zinc plating solution. It took about 30 minutes to put a coat of zinc on the parts. 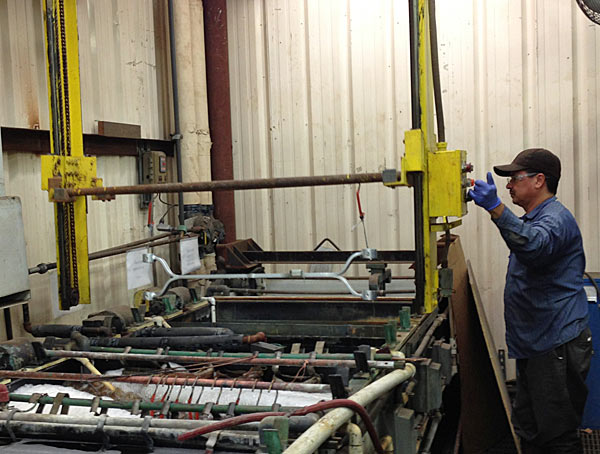 Here the lever arm is lifted from the tank by this small gantry that will dip it into a rinse tank. 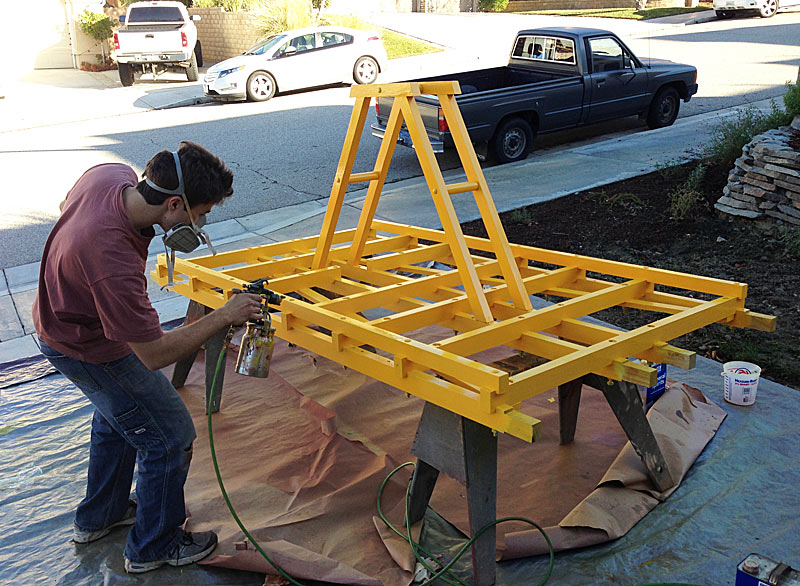 Here I am painting the yellow hand car. Yellow is tricky in that it requires several coats of paint to remove the transparency of the light color. I chose oil based paint to allow for easy touch up in the future.  Red framed hand car. This was painted with a well pigmented barn paint that covered nicely. 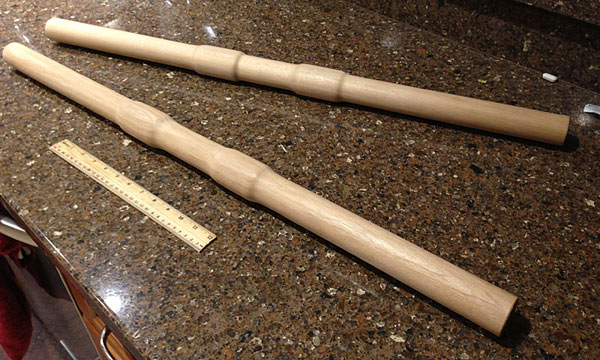 Lary Shaffer of Scarborough Maine manufactured two sets of hickory handles for the hand cars. Lary is rebuilding a hand car of his own using parts that he purchased from a local railroad almost 50 years ago as a teenager. Lary is a master furniture maker and specializes in building original style Morris Chairs. His web site can be found here. 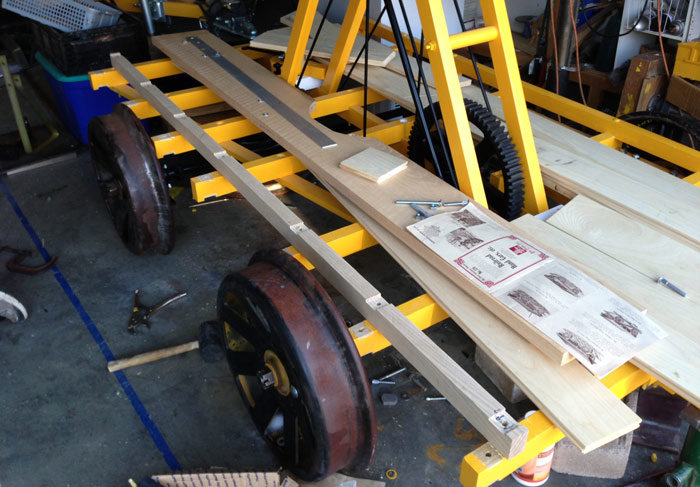 Two things here. On the happy side my ash tongue and groove floor is ready to be installed. I had this milled just for the hand car by a Pennsylvania woodshop. This clear ash and was quite expensive, running about $500 a car. Notice the missing beam. I drilled the brake system holes in the wrong place, leading to a holed up beam. Because of its importance, I decided to cut a new beam. 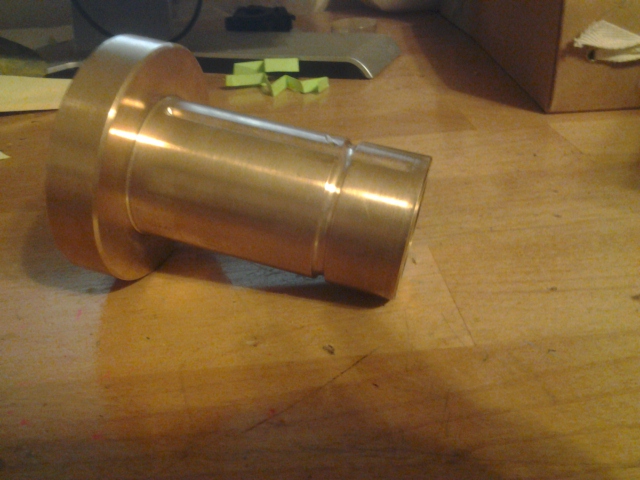 One of the more interesting parts is the loose wheel bearing made from a bronze and lead cylinder. This was a rather difficult part to manufacture and I think it stressed out my machinist due to a complicated taper to fit around the axle. The purpose of the bearing is to allow one wheel to spin independently of the axle to allow for better tracking around curves. The part was replaced by the invention of the split axle sometime around 1925. However, the loose bearing is a much neater way of accomplishing the task. 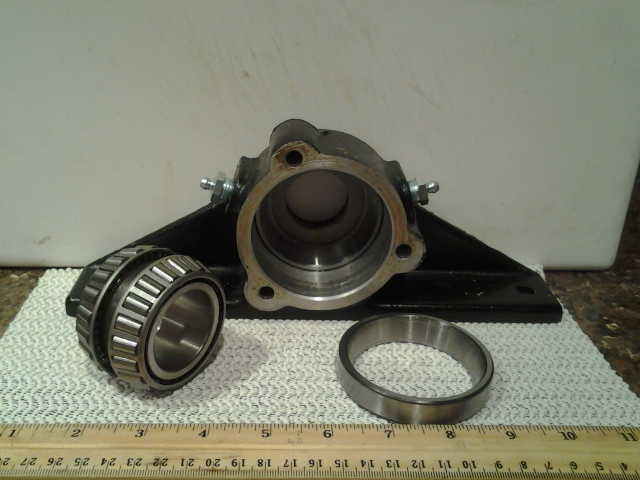 I use brand new, top of the line Timken double coned roller bearings on my hand cars. Kalamazoo used these on their later hand cars. These bearings cost nearly $200 each. The housings are from a Fairmont motor car and have been refurbished. 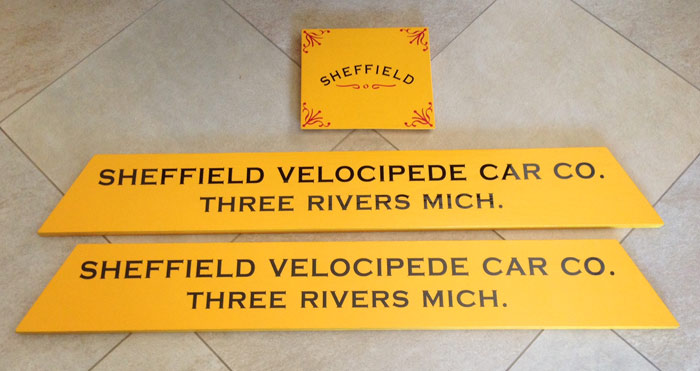 Another challenge completed. The lettering was painted on by my sign painter who used a vinyl stencil to the paint perfect lettering. The boards are mounted on the sides of the deck. I owe thanks to Joe Devlin of Alameda Car Works who supplied me with reference artwork to enable my sign painter to locate the correct font. Joe manufactures scale model hand car kits. 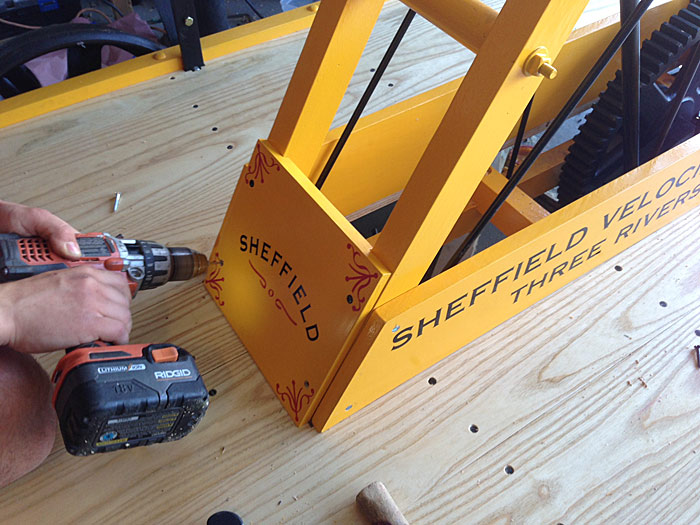 Here I am screwing the placard in. First, I drill the hole, then I drill a bigger hole for the neck of the screw, then I counter bore the hole. Finally, I screw in the flat head screw. Also, notice the deck. This was custom milled tongue and groove white ash that is screwed in place using very hard to find blued steel screws. 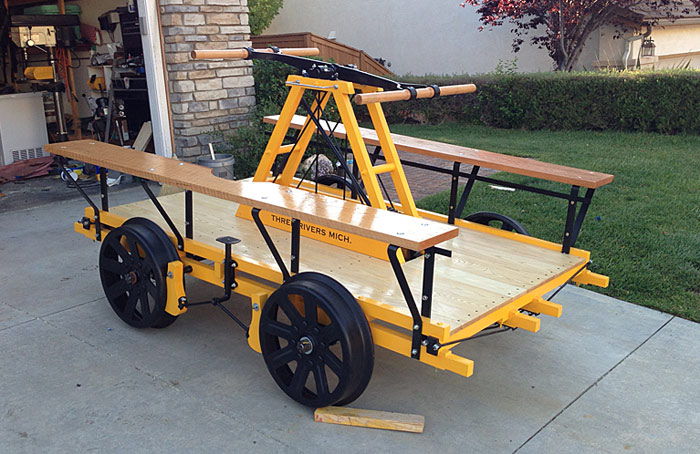 Except for the gear cover, the car is completed. Now comes the process of touching up paint and tuning up the car. Generally, the car will need to be broken in for 20 or 30 miles of running before it is ready for service. 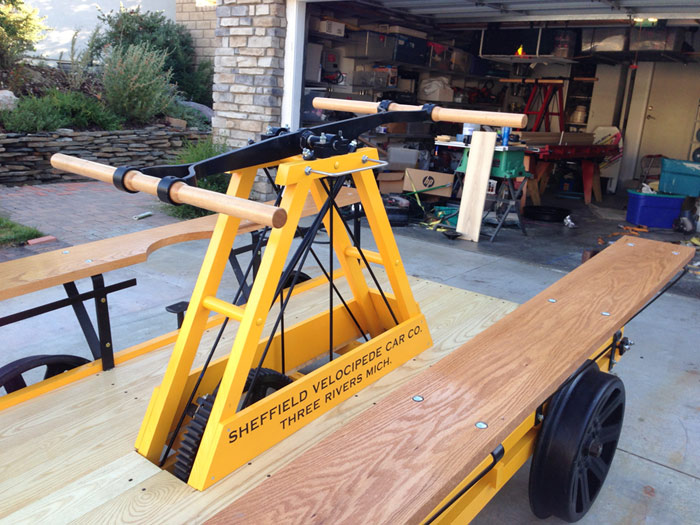 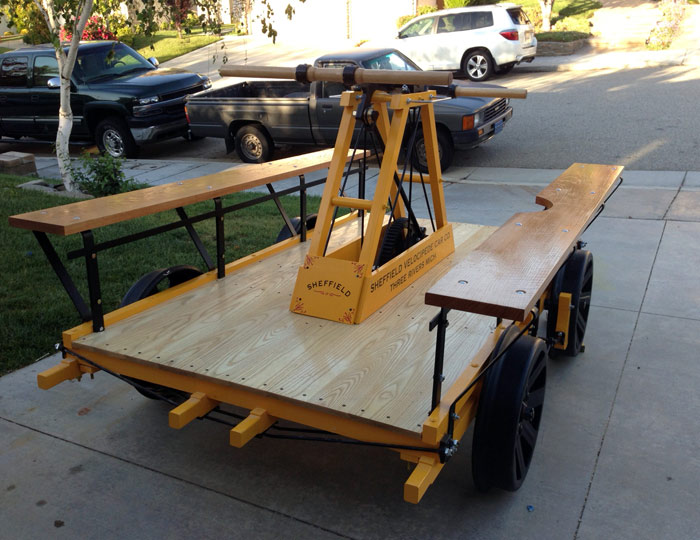 The benches are pretty comfortable. 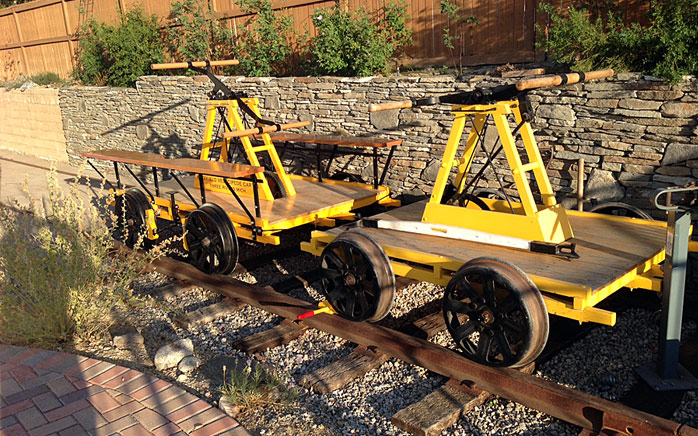 Side by side with my standard hand car Return to projects menu |
|